

Pages vs Posts
A WordPress web site consists mainly of two types of articles:
Pages are “static”, timeless articles, such as the About page or the Contacts.
Posts are entries which relate to a particular time. They are the “web log” which is presented in reverse chronological order (Latest first).
Sometimes, custom posts are set up. These are particular types of posts, such as for events, which are presented in a special way.
To create a New Post or Page
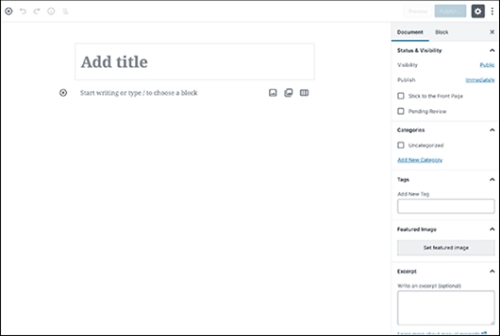
In the left sidebar menu, click on Posts » Add New to create a new post or on Pages » Add New to create a new page. You will be taken to the editor screen:
Blocks
From WordPress 5.0 (late 2018), the “classic” text editor was replaced with a block-based editor which replaces the single edit field of the old WordPress editor with lots of individual “blocks”.
Blocks are content elements that you add to the edit screen to create content layouts. Each item you add to your post or page is a block.
These blocks allow you to build more complex designs than was possible in the old WordPress editor.
A block can be pretty much anything. For example, you can have blocks for:
- Regular text
- Images
- Video embeds
- Buttons
- Widgets
- Tables
- etc.
Each block is its own entity that you can manipulate on an individual basis. Because each block is “separate”, you can also add things like custom backgrounds just for specific blocks.
Adding a Block
The first block of every post or page is the title. After adding that, you can use the mouse or tab key to move below the title and start writing.
By default, the first block is a paragraph. You can just start writing immediately.
If you want to do something different, you can add a new block by clicking the +Plus icon near the top left of the screen

This will give you a menu of the commonly used block and a search bar if you need some something unusual. Select the type of content you want to add:
- Common Blocks – contains basic building blocks like images, paragraphs (regular text), headings, quotes, etc.
- Inline Elements – only contains one block for an inline image.
- Formatting – lets you add more formatted content like pull quotes, tables, or the classic WordPress text editor
- Layout Elements– lets you split text into two columns, include buttons, separators, or the “More” tag
- Widgets – lets you add shortcodes, latest posts, or categories. It’s even possible to display sidebar widgets right in Gutenberg.
- Embeds –embeds content from external sources like Twitter, YouTube, Facebook, Instagram, and more.
Each block comes with its own toolbar which appears on top of the block. The buttons in the toolbar change depending on the type of block you are editing.
Each block can also have its own block settings which appear in the right column of your edit screen.
You can move blocks up and down using the arrows that appear at the left of the block when you hover over it or hold your mouse down on the six dots on the left of the block and dragging and dropping the block.
Adding Text
Write your text in the editor or, if you like, write in Microsoft Word or Google Docs and paste it in. The WordPress editor will automatically convert it to blocks.

When you start typing, a set of icons for formatting will appear above your text.
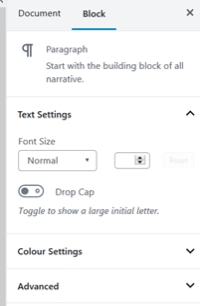
For more advanced styling, select the block you want to edit,
click the Blocktab at the top right of the screen and use
the functions in the column below.
Adding an Image
Hover over the spot where you want to insert your image and click the plus icon. That will create a break. Then click the plus icon again to insert an image block.
You can then upload an image file or select one from the media library or a URL.
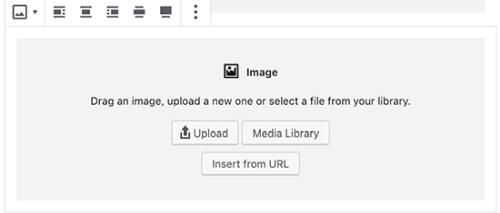
Alternatively, you can drag and drop images from your computer and the editor will automatically create an image block for it.
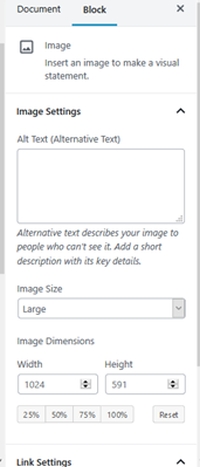
Once you have added an image, you will be able to see the block settings on the right where you can add metadata for the image like alt text, size or a link to the image.
Adding an Image Next to Text
You can do this easily with the Text & Image block.
This block comes with two blocks placed side-by-side allowing you to easily add an image and add some text next to it.
Adding a Video
To insert a video from YouTube, Vimeo, TED or another supported source (there are many), click on the +Plus icon, scroll down to the Embeds tab and select the appropriate block from the Embedstab.
To insert the video, all you need to do is enter the URL of the video and click “Embed”.
Adding a Quote
Hover over the spot where you want to insert a quote, another block as above and select “Quote”. Click into the block and type the text of your quote.
Publishing Your Post or Page
By default, all posts are initially assigned to the “uncateorized” category – as such, they will not be visible on the web site. The post must be assigned to its category to be seen on the web site.
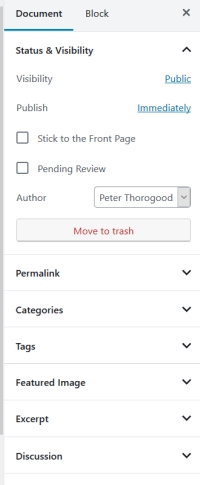
To assign your post to its category, click on Document in the right sidebar and select the appropriate category in the dropdown.
When you are finished editing, publish your post by clicking on the Publish button near the top right of the screen.

A message will appear to confirm that you are ready to publish. If you are ready, click the Publish button again.


Join the conversation on Facebook.